Why is my Sublimation not Transferring? How to Fix Sublimation Issues
As much as I love sublimation printing, it can be a tough trade to master. I often found myself asking why my sublimation wasn’t transferring when starting out, blaming everything from my converted Epson printer to the design itself.
Troubleshooting such issues can be its own reward, however, and I’ve found there’s a number of ways to fix sublimation issues – and running through them can help you clear up any errors quickly. I’ve broken down the main causes and solutions below – from the printer itself to the paper you’re using.
Always run a test print before committing to any serious printing. It’s a surefire way to troubleshoot print errors before they happen, and extremely helpful for beginners.
How does sublimation work?
Before we can diagnose the issue, it’s important to understand how sublimation actually works as a printing method.
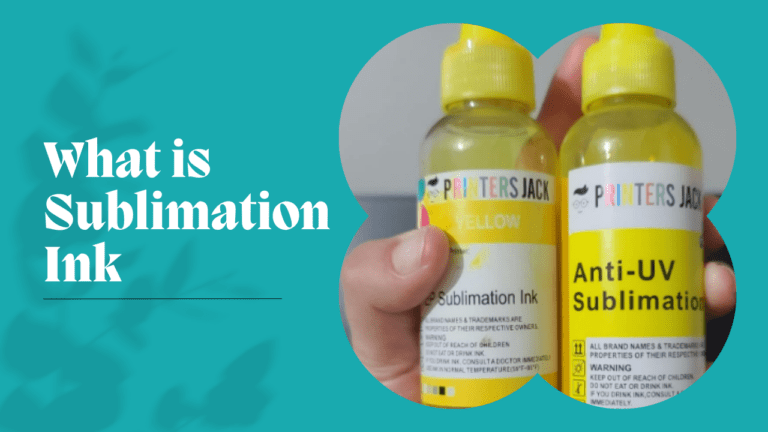
Sublimation is a process in which a design is printed using specialist sublimation ink on to specialist paper. When heat is applied, this ink turns into gas and can be transferred to a suitable substrate such as a t-shirt or tumbler. This chemically bonds the design with the substrate, creating a vivid and long-lasting design.
Sublimation chemically bonds the design to the subject, and is therefore irreversible.
With the process explained, we can see the main steps along the process where issues may arise. Even though it’s effectively three steps, there are a number of things that can cause your sublimation print to not transfer.
Why is my sublimation not transferring?
Now let’s actually take a look at what can go wrong when sublimating, and how to fix it:
Wrong Substrate
Whilst you can sublimate on to a number of materials and achieve great results, there are some that work better than others. The best fabric (or “substrate”) for sublimation is anything made from 100% polyester, which makes for the most efficient chemical transfer. Some materials such as cotton blends If your design is looking faded or dark, it may be worth swapping out the substrate.
Clogged Print Heads
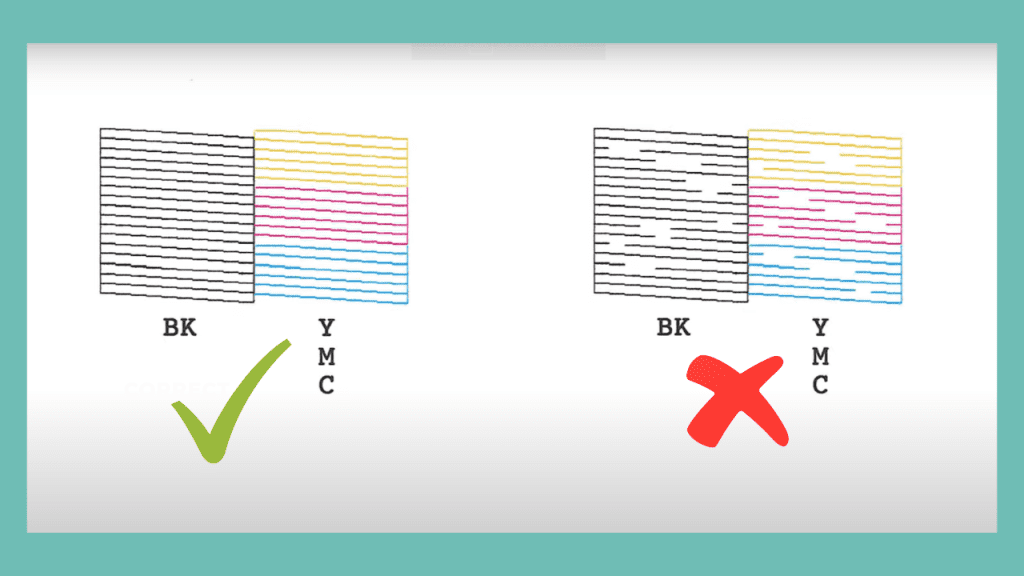
The first place where sublimation can go wrong is in the print process itself. One of the most common issues with printers is a clogged print head nozzle, where ink has dried or become stuck in the printer. You’ll find an option for “Print Head Nozzle Check” under the maintenance tab of your printer settings. I’ve highlighted it below on my Epson EcoTank:

- Once you click this option, your printer will print out four colored lines or grids.
- If these lines are coming out smoothly then your print head nozzle isn’t clogged. But if you find that there are blank spots or uneven lines then you need to clean your print head nozzle.

In the maintenance tab, you’ll also find the option for “Print Head Cleaning”. Click on this option and let the automated cleaning process take over. Once that is done, run the Print Head Nozzle Check again.
If your printer doesn’t have an automated cleaning process, use a slightly damp paper towel or sponge and lightly clean the print heads, then leave them to dry.
Check if the printed lines/grids are smooth this time. Repeat the process until you get clear prints.
Incompatible Ink
Sublimation inks are different from the normal ink we use for printing, and are not as universal as other manufacturers. It’s always worth checking whether the ink is compatible with your chosen sublimation printer.
If you are using a converted Epson printer, it’s worth noting that the process of converting them for sublimation is irreversible. Be sure to clean out any old standard ink from the ink tank and don’t use the printer for standard prints.
Incorrect Heat Press Settings
The main stage where sublimation can go wrong is in the heat transfer stage: when the print actually has to be pressed onto the substrate. If you are using a heat press machine, make sure that you’ve correctly configured your temperature and pressure settings correctly. Additionally, don’t remove the substrate from the press too early – or too late.
For simplicity’s sake, I’ve detailed the best heat press settings for some of the most common substrates here:
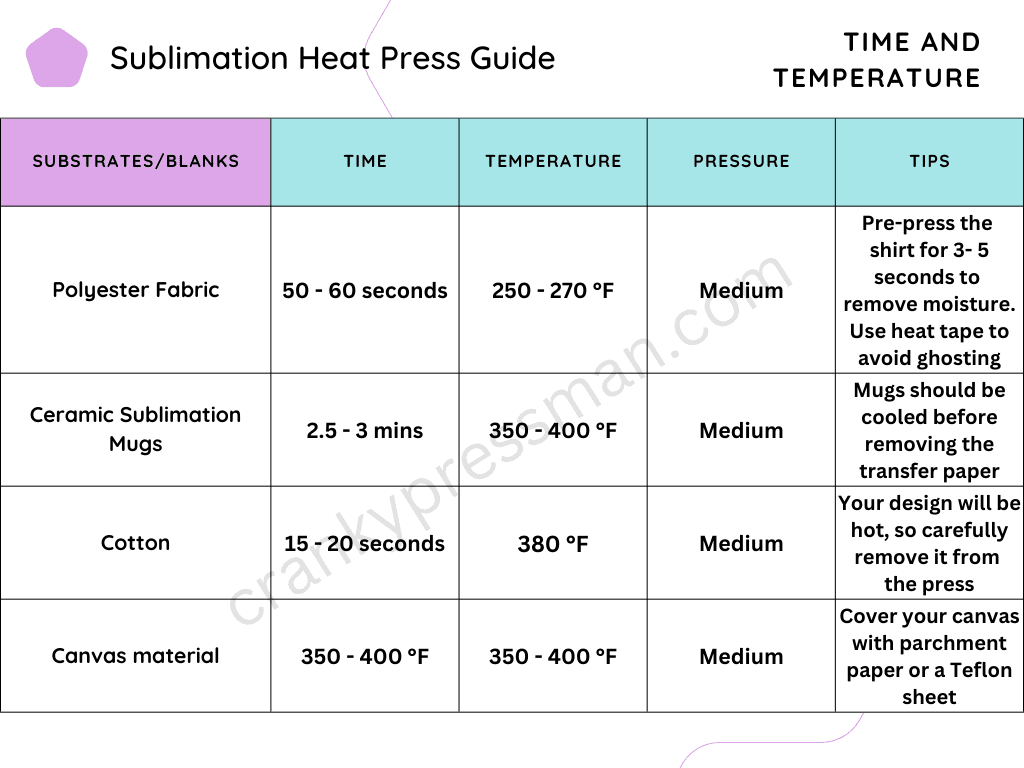
Remember to preheat your heat press so that it’s at the optimum temperature before you insert your design.
If you are doing everything right but the results come out wrong, you may have an incorrect temperature readout. Use an infrared gun to determine the accurate temperature and see if that helps fix the issue. If your heat press is faulty, see if you can claim to get it repaired or replaced.
Moisture in the Substrate
This is a less common cause of sublimation issues, but it’s worth flagging. If there is too much moisture in your chosen material, it can cause issues in the chemical bonding process that can ruin the final product. Make sure your substrate has been stored in a cool, dry place; and – if it’s a clothing item – iron it before sublimation.
Iron your substrate before sublimation regardless of its moisture, as it helps remove any creases from the fabric.
Incompatible Sublimation Paper
Sublimation paper is – surprisingly – paper used for sublimation. It’s not your standard paper, and is designed to specially release the gaseous ink when heat is applied.
If you’re experiencing leaking or “bleeding” when you attempt to transfer your sublimation print, the paper may be the root cause of the issue. If the paper used is not sublimation friendly then it may absorb some of the ink instead of transferring it perfectly onto the blank.
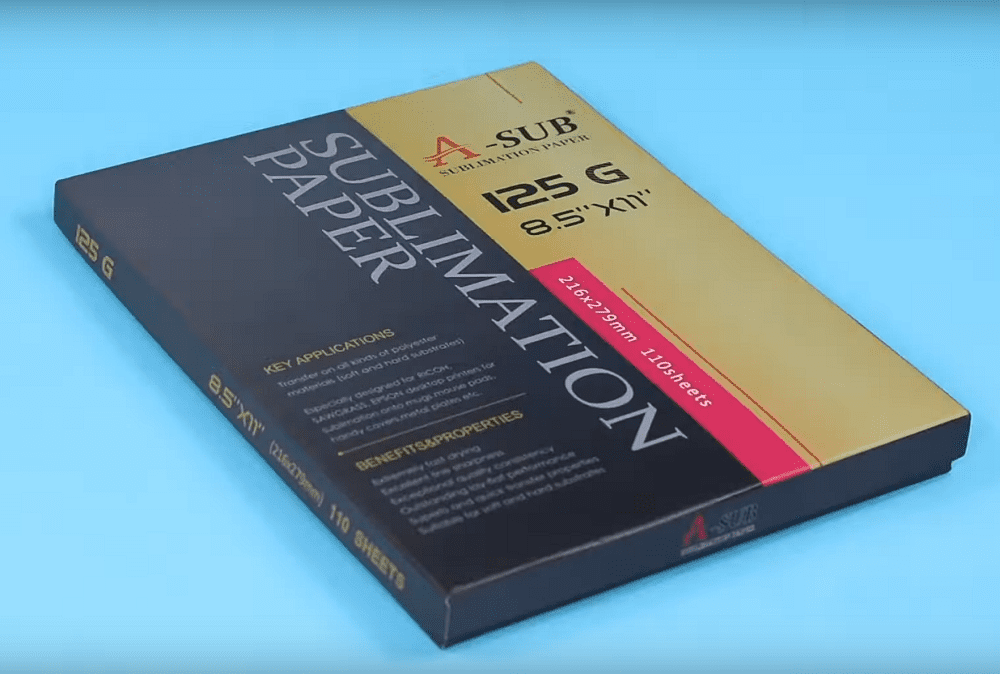
We recommend you use A-SUB 125g paper. It’s highly fracture-proof and has a transfer rate of more than 98%.
Consider investing in a better sublimation paper brand, or buying a fresh batch.
Printer Settings and Profiles
Depending on how you configure your printer in your PC or laptop, you can cause issues with your transfer. You can tailor these using a number of preferences in the printer driver that should have installed when you connected to the printer.
Here, you can find multiple options for your printer preferences. You can save these preferences to create different printing presets for garments, ceramics, etc. The first options you’ll see on top will be document size and orientation. Depending on your blank and the size of your design, make sure that you adjust these two for perfect prints.
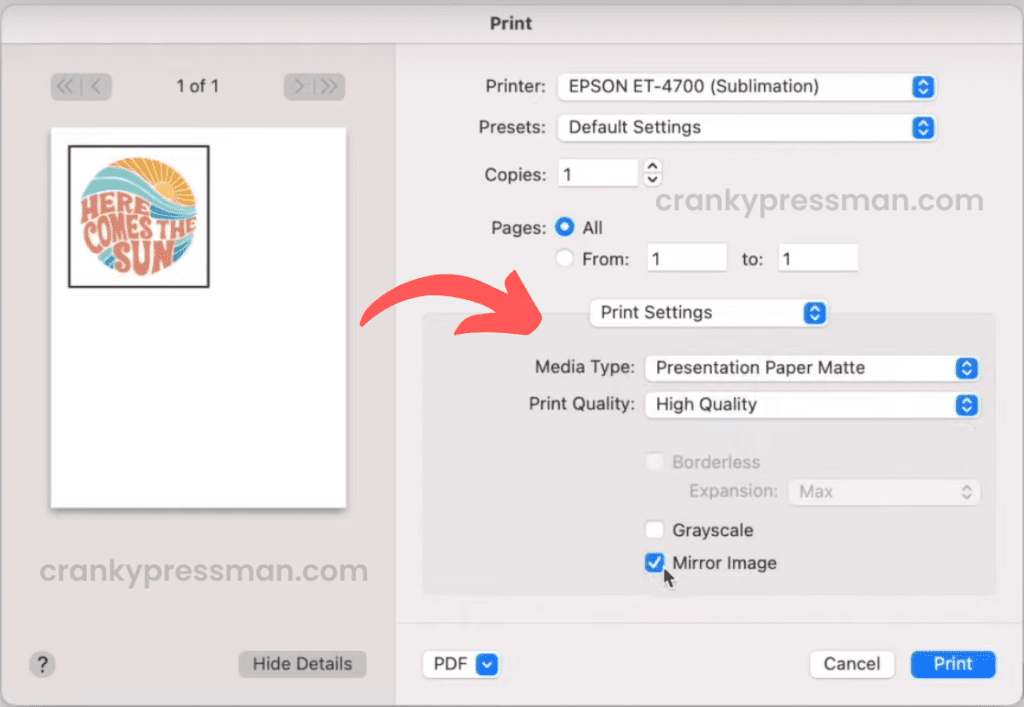
I always put the saturation and color density ever-so-slightly higher for my prints, either in the original design software or in the print settings.

If your colors aren’t coming out to the right shade, you should consider installing an ICC color profile: this helps your printer read the colors of the design better for vivid results. This is particularly helpful for sublimating on dark shirts or other materials, as it means your design transfers more effectively and with better color results.
Best Materials for Sublimation
If you plan on getting started with sublimation printing, it’s worth mentioning you can’t sublimate onto anything and everything. The high-temperature requirements of sublimation require materials with high heat capacities, which not every material has. Here are some of the best materials for sublimation:
Polyester
A 100% polyester shirt is your best choice for sublimation, with synthetic fibers being ideal for chemical bonding. Choosing a light-colored polyester shirt is better than a darker one. You can find blended shirts with other materials such as vinyl, which can make for more varied designs – though results can vary.
Canvas
Canvas is produced using mostly cotton, in most cases. Therefore you’ll face the same problem while sublimating on canvas as on a 100% cotton shirt.
Use sublimation coating spray as a quick solution, which when dry will allow you to sublimate onto the canvas. Since the coating material tends to change the outer texture of the canvas, it would be better to use a thin coat over the entire surface.
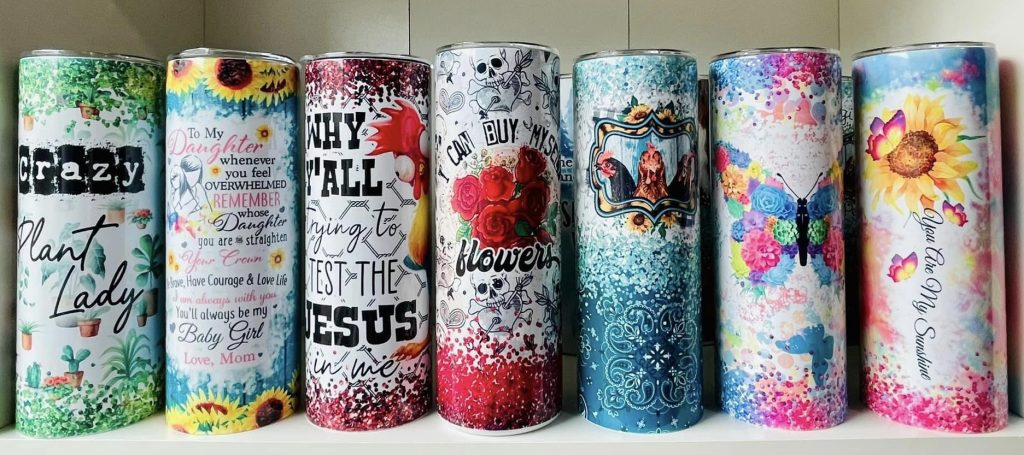
Ceramics
A tumbler, plate or mug is a great thing to customize, and an easy gift for friends and family. Though not every ceramic surface is created equal. Like with t-shirts or hoodies, they need to be made of a compatible high-heat surface. We recommend poly-coated ceramics, which are fine for use with most sublimation tools such as a tumbler heat press.
In case you’re trying to sublimate on a ceramic tile, mug, or plate that isn’t poly-coated then you have to coat it yourself. Use sublimation spray to create a thin layer of polyester and let it dry before sublimating.
FAQs
You can use a standard flat-top or swing-away heat press for sublimating on mugs, instead you’ll need to invest in either a dedicated tumbler heat press or a convection oven for even heat distribution.
No: Whilst it can be tricky to get started, sublimation is a relatively simple process done in around three steps. It can be a fun and relatively quick way to create custom clothing or other novelty products.
Final Word
I hope that, having read this post, you’ll have found the answer to why your sublimation isn’t transferring. With any hope, you’ll be back to creating great designs already, and are well on the way to improving your sublimation prints.
For more tips on sublimation printing, including free sublimation designs and offers, stay tuned here at Cranky Press Man!